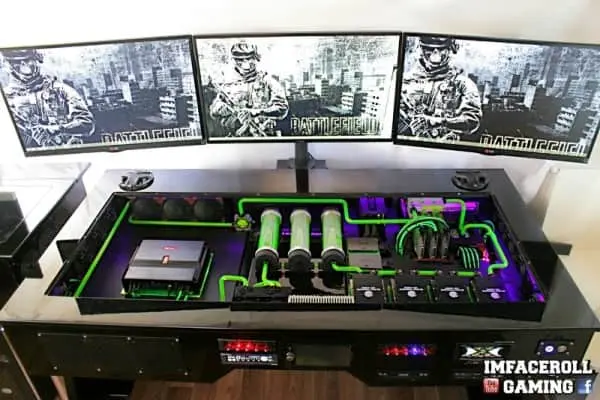
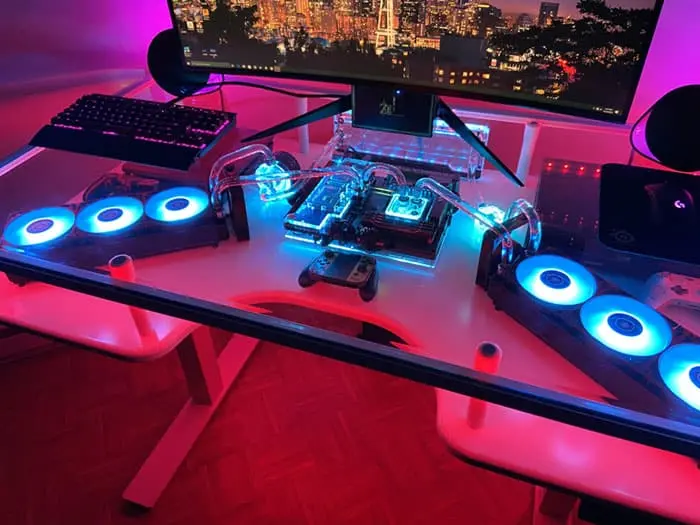
For those gaming enthusiasts who need a powerful gaming station but don’t have much space, a computer built into desk is the perfect solution.
A computer built into a desk is the next level of Gaming PC builds that merge the world of furniture design and technology in one place.
Not only the uniqueness and beast look of this desk PC grab everyone’s eyeball but its space-saving design and awesomeness will give you the ultimate gaming experience.
Although building a DIY desk PC does not sound like a practical thing, this beast will surely make you feel proud of having it as a part of your gaming desk setup.
In this article, we’ll explore the advantages and design considerations of a computer built into a desk and share with you some unique examples to inspire you to build your own EPIC desk PC.
Pros and Cons of a Computer Builit into Desk
Before we jump on how to build a computer into a desk, let’s have a look at what are the pros and cons of building a Desk PC.
Pros of Building a Desk PC
- A computer built into a desk is the coolest gaming setup for any hardcore gamer.
- The custom desk PC looks awesome and the design is EPIC.
- You’ll have full control over the design process so you can give the desk PC the look and shape you want.
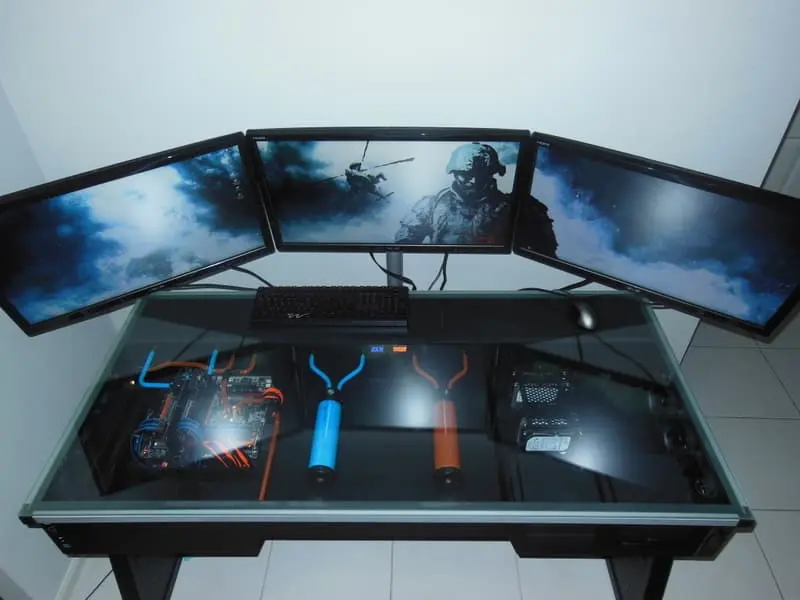
- The design of the desk PC provides plenty of space to accommodate multiple monitors and many gaming accessories.
- You’ll have endless opportunities for the PC configuration such as a water-cooling system and RGB fans.
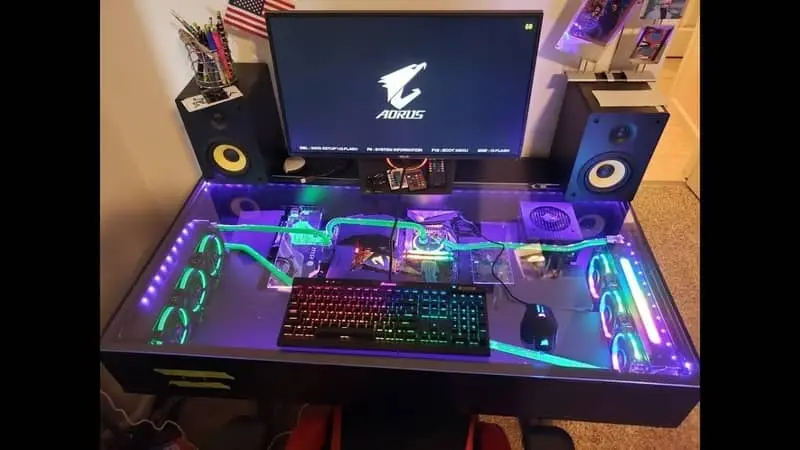
- You can make your DIY desk PC even more appealing by installing LED light strips inside the desk.
- Since the computer is inside the desk, you’ll not need additional space for the PC tower.
- Managing the power and USB cables is much easier since everything is inside the desk.
- There are no visible wires and cables outside because all PC components are inside the desk case.
- The entire desk PC build can be a fun hands-on project.
Cons of Building a Desk PC
- Building a Desk PC can be challenging if you aren’t experienced in how to configure the gaming PC components.
- It can be hard to build a DIY desk PC until you have basic experience in woodworking, metalworking, and operating power tools.
- Building a desk PC from scratch will take time as well as effort.
- Building a desk PC could be more expensive than a standard desktop case.
- Cleaning the dust and managing the PC components can be challenging depending on how you’ve built your desk PC case.
- Moving or shifting the desk PC to a new location is a hassle because of its heavy design.
How to Build A Custom Desk PC
After looking at the pros and cons of building a custom Desk PC, let’s dive deeper and see how you can build your custom Desk PC.
To incorporate your dream computer built into a desk, you’ll have two ways.
- Build a Custom Desk PC from Scratch
- Build it using Pre-made Desk PC Cases
We’ll guide you on both methods whether you want to build your custom Gaming PC Desk from scratch or build it using a pre-made Desk PC case.
First, let’s see how you can build it from scratch.
How to Build a Custom Desk PC from Scratch
If you’re experienced in DIY, building your custom Desk PC from scratch would undoubtedly be the best option.
That’s because building a custom desk PC on your own will allow you to customize the desk design on your creativity level to meet your preferences, setup needs, and style.
You can also upgrade your gaming PC configuration by adding high-end hardware, cooling systems, etc to enhance the gaming performance.
But remember, building a custom desk PC is something that involves woodworking or metalworking experience as well as you’ll have to use some power tools.
That is why building a desk PC will take time and effort and for those who aren’t DIY experienced, incorporating a desk PC will not be as easy as it seems.
Tools You Need to Build a Desk PC
Before you can start to work on your desk PC project, there are many tools and supplies you’ll need to gather as these will be required in constructing your desk PC.
1. Custom Desk PC Plan
The first thing you’ll need to start working on your desk PC project is to plan everything about what are you going to build.
Like any new project you start, you’ll need to have a full-proof plan for your desk PC project either in printed format or digital format.
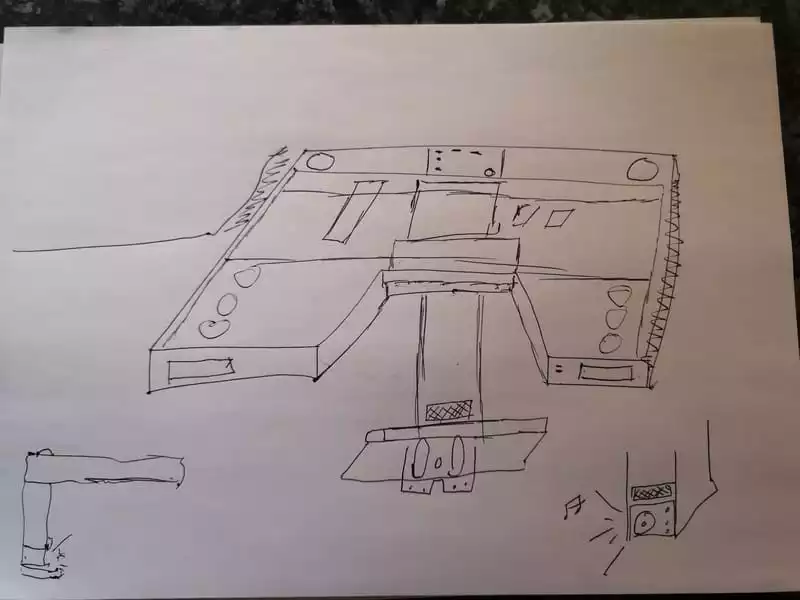
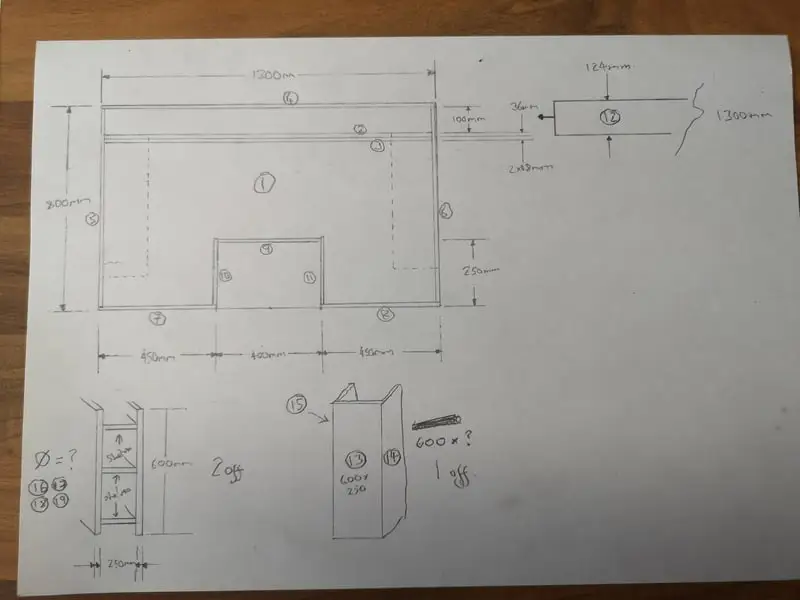
You can draw your desk PC diagram on plain paper using a pen or pencil or you can use a 3D modeling software like CAD Pro if you’re building it on a professional level.
Whether you have a rough plan made on your own or have a professionally made plan, you just need a plan of what you’re going to build and how it will look after completion.
You can put your expertise and creativity level to build your plan or the best way is to draft it by following the build log of someone else who already has built their project.
Below are the perfect examples of computer-built-into-desk plans that demonstrate how you can create your plan without using any 3D modeling software.
2. Built-Materials
Once you have a plan for your desk PC case and how your gaming components will be configured, the next thing you need is a set of built materials.
For building your desk PC case, there are various types of materials such as MDF (Medium Density Fiberboard), hardwood, and metal that you can use.
Each type has its advantages and disadvantages and you can use them based on the finish that you want to give your desk PC.
MDF (Medium Density Fiberboard) is considered the best material for desk PC cases because they are durable, very strong, and easier to maintain than regular wood.
MDF boards are also cheaper, come with different finishes, are easier to work with, and give a nice smooth surface when well sanded and painted.
You can also use steel or aluminum to build a sturdy desk PC case but these materials are a bit more pricey than MDF boards and require a lot of metalworking effort.
Plus, working with steel and aluminum increases difficulties because if the edges and corners are not properly finished, there is always a concern of sharp injuries.
Additionally, the final product will be quite heavy because these materials are heavy which could make shifting the desk PC to the setup area more hassle.
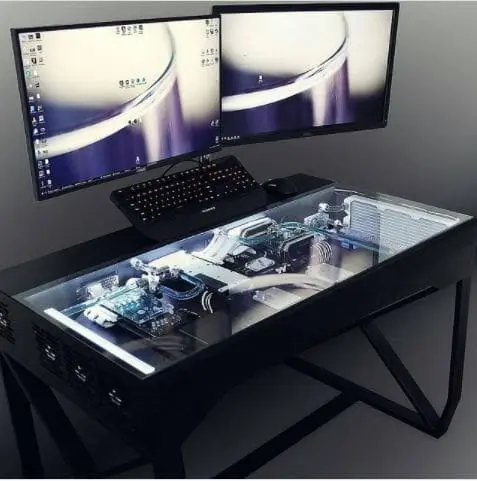
For the top of your custom desk PC, you can use glass material and that is because you would want to keep the inside of your desk PC completely see-through so you can show off your high-end PC configuration.
And to be honest, this is an obvious reason because it makes no sense to build a computer into a desk if you are going to hide everything inside of it.
You will also need screws, nuts, and bolts of different lengths and sizes to fit the desk PC case and assemble the computer parts inside it.
3. Components of the PC
After gathering the built materials for the desk PC case, the next thing you’ll need is the computer components that will be assembled inside your custom desk PC.
After all, you’re building a custom desk PC, so you’ll need all the functional computer parts that go into a standard gaming PC.
I’m not counting any specific PC hardware for the desk PC. It’s completely up to you what configuration you’ve decided to give your PC according to your setup needs.
But your gaming computer potentially includes a motherboard, hard drives, SSD drives, a power supply unit, CPU fans, USB ports, and some custom buttons.
Besides using normal CPU fans and cooling systems, use RGB fans and custom water cooling systems as these make your system look just awesome.
You can even use LED strip lights inside your Desk PC to make yiour desk PC look more appealing or to give it a sci-fi touch.
4. Carpentry Tools
From shaping the desk PC case to assembling the PC components inside it, you’ll require a lot of power and manual-operated carpentry tools.
All the necessary tools are mentioned below:
- Measuring tape
- Power drill with a set
- Screwdriver
- Circular saw
- Jigsaw
- Palm sander
- Plier
- Nailer
Along with these power and manual tools, you must have some level of carpentry skill and experience operating carpentry tools.
You don’t have to be an expert in carpeting and using these tools, but at least, you must have ideas of how to use these tools precisely.
Or you can hire a professional carpenter, discuss the project with him, and show him the desk PC plan so he can build your desk PC the way you want.
Steps to Build a Computer into a Desk
Once you’ve gathered all the necessary materials and tools, you can proceed to start working on your custom desk PC project.
Let’s go over the steps one by one and learn how to build a desk PC from scratch.
1. Get to Know the Design of Your Desk PC
First of all, prepare your desk PC plan so you can get to know the design of the desk PC case and the configuration of computer parts.
In your sketch-up model, you should mention all the cuts, holes, and lengths of different parts such as legs, top surfaces, side surfaces, drawers, etc so you’ll have a clear idea of where to start.
It’s better to start planning out the upper side of the desk then the middle sections such as drawer units and then the bottom sections such as legs.
How big your gaming desk PC should be? To determine this size, first, take the measurements of the space available in your room where the desk PC will be situated.
By doing this, you will have an accurate idea of how big you should make your desk PC so it doesn’t end up being bigger or smaller than your available room size.
Don’t just give your desk PC any size as you might come across a situation when you will have to start all over again because of the wrong desk measurements.
Common gaming desk size is 60 inches wide, 30 inches deep, and 30 inches high. But you should consider your physical height, the size of your setup, and available space to determine the right size.
Check out this post on how big should a gaming desk be for further guidance.
Check out this tutorial from CraftedWorkshop to get a clear understanding of how to come up with or plan out a desk PC design.
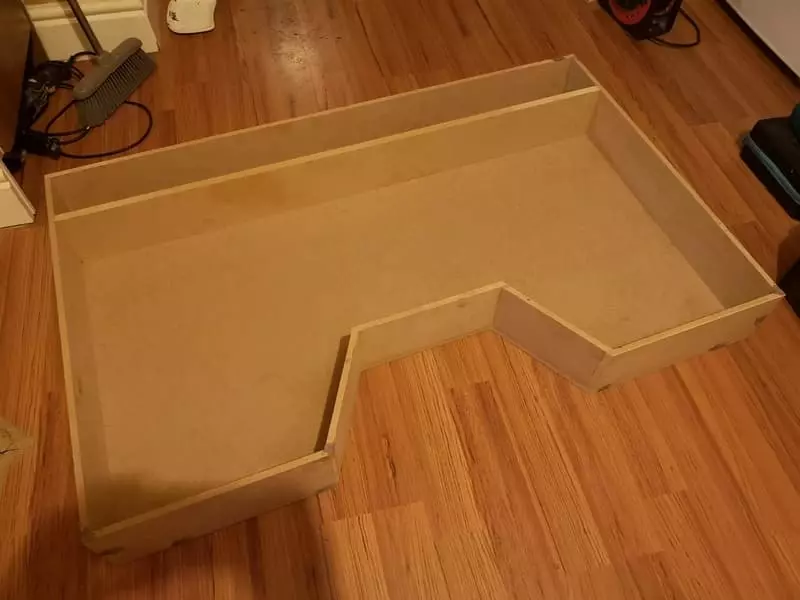
2. Break Down the Materials in the Right Measurements
Once, your desk PC plan is ready with all measurements for different parts, cuts, and holes, now you can start breaking down the materials to build the desk PC case.
If you’re using materials like Plywood, MDF board, or hardwood blocks then you can use a circular saw or table saw to cut the material in different sizes as per the plan.
First of all, break down the materials for the upper sections, mid sections, drawer units if it has any, and then leg sections.
Cut the material very precisely into different squares and rectangular pieces according to the measurements you have in the SketchUp plan.
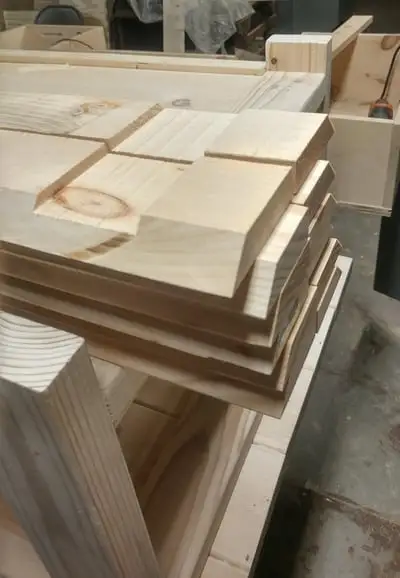
The upper sections (desktop) of the desk will usually have a rectangular shape while the leg sections will have square pieces of materials.
To get more hands-on experience with how to cut different parts of your desk PC based on the plan, check out this video.
3. Determine the Glass Top
When breaking down the different parts of the desk PC case, you should also determine the accurate size of the glass top that you use for the desk tabletop.
Tempered glass tops are the perfect choice for your desk PC that comes in thicknesses such as 3/6 inches, ¼ inches, ⅜ inches, and ½ inches.
The glass top with ½ thickness is the perfect option for the tabletop as these glass tops are the most sturdy ones and can hold hefty setups.
So, you’ll need to break down the glass top into the appropriate size for your tabletop.
4. Cut Attachment to Fit the Legs and Side Panels
After breaking down the different parts, now cut all the different parts and make appropriate attachments to fit them together.
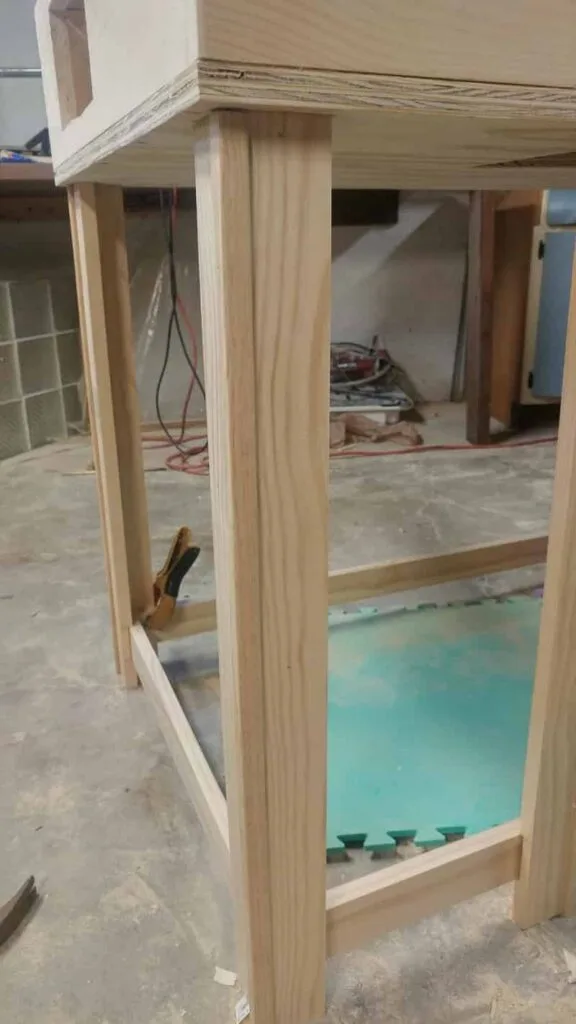
Make an exact measurement on the rear and front, sides, and bottom of the desk, and cut appropriate attachments.
You can use a jigsaw to make rectangular holes and a drill press to make holes to fit the different parts of the desk.
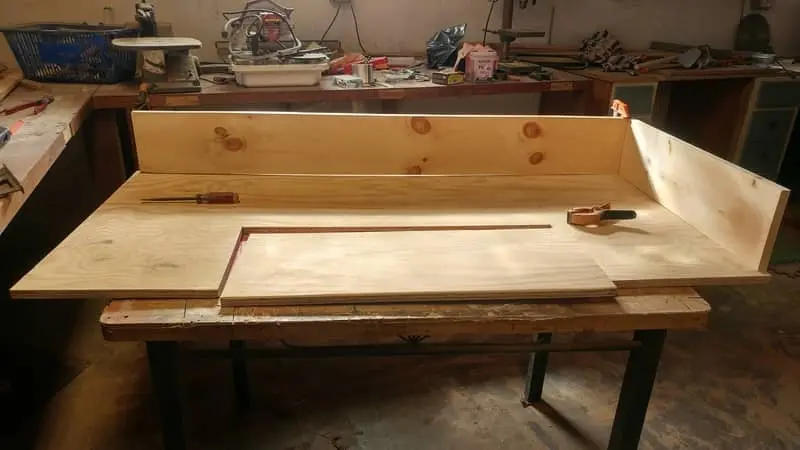
5. Assemble the Different Sections
After making the attachments and holes where needed as per the plan, now you can start to assemble the different sections one by one.
First, attach the upper sections using nails and glue the joints to build the midsection of the desk PC case where all the PC components will be fitted.
Attach the side pieces the same way using braid nails and glue and build the drawer unit which you might be using to store extra desk accessories.
Make the shelf or drawer unit sturdy enough and ensure they are properly jointed if you’re going to use these units as the leg support for your desk PC.
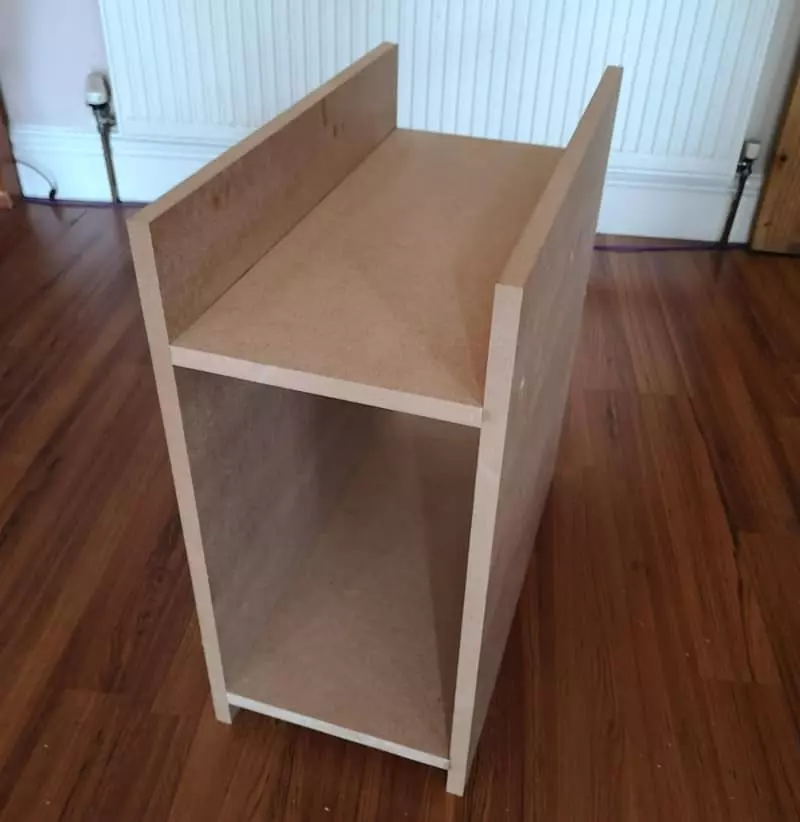
Now, connect the upper section to the midsection and then attach the drawer unit to the midsection to complete the structure of the desk PC.
A biscuit joint technique will save effort as well as crucial time. You can use tools like a biscuit jointer to get the job done efficiently and get your desk ready in a short time.
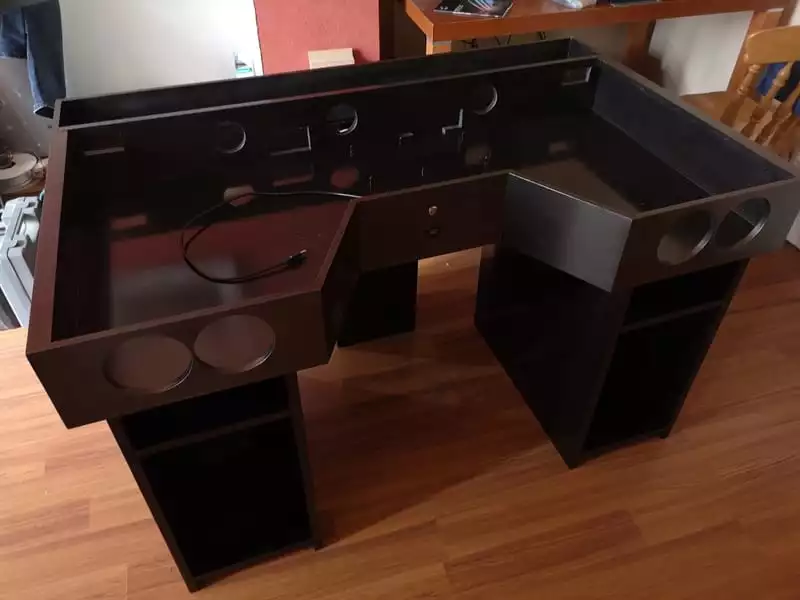
6. Make Holes to Assemble PC Components
After attaching all the parts, you’ll need to make various holes and input/output ports required to fit the motherboard and all necessary PC components.
Drill screw holes where the PC fans will fit in and the power cords and USB cables will pass through.
You can use power tools like a jigsaw, trim router, and power drill as these tools will make a bunch of holes precisely and efficiently.
7. Sand the Outer Surface
After attaching all the parts, get some sandpaper and sand all the possible outer surfaces from the bottom to the upper sections.
This will eliminate roughness on the desk surface that is caused by cutting and drilling the materials into pieces and leave behind a smooth finish.
Believe me, it won’t take that much time but it’s worth sanding your desk for the sake of a nice smooth finish.
8. Paint the Outer/Inner Surface
After finishing the sanding process, it’s time to paint the desk PC case for a smooth finish or to give the desk the same color scheme as your room.
Get a high-quality polyurethane paint and start coating the inside and outside of the desk PC case twice or thrice.
We recommend spray paint rather than hand-brush because it offers a more durable satin finish that looks much nicer while brush painting may offer uneven coverage and leave brush strokes behind.
9. Assemble PC Components
Finally, it is time to install the motherboard and all necessary computer hardware inside the desk PC case and get your beast ready to take into the battle.
Attach the motherboard to the midsection, HDD drives, CPU fans, cooling systems, the power supply unit, etc where the screw holes are made for them.
Install all gaming hardware one by one and pass the power and USB cords neatly through the cord-management holes so they don’t get messed up.
You can utilize cable racks, cable trays, cable ties, and zip ties to better manage the computer cables without making the PC configuration look cluttered.
10. Install LED Strip Lights
Lastly, you can install LED strip lights inside the desk PC case around the computer components to add vibrant or ambient lighting effects to the desk aesthetics.
It is completely up to you whether you want to add LED light strips or not.
But if you use LED lights, it will surely take your DIY desk PC setup to the next level and grab everyone’s eyeball who saw your gaming desk.
11. Take Your Desk PC into Gaming Battle
After following all the steps and doing the process accordingly, now your custom desk PC is ready to take into the battle.
That’s how you can build a computer inside a desk on yourself from scratch.
But if you don’t want to get your hands dirty or you don’t want to spend a lot of time making your own DIY desk PC case, here’s the solution.
Build a Desk PC with a Pre-made Case
Up until now, we talked about building a DIY Desk PC yourself, but there is another way to build your desk PC in less time and that is using a ready-made desk PC case.
There are some high-end prebuilt desk PC cases available for sale. So, prefer buying a ready-made desk PC case and configuring everything inside it.
These desk PC cases are professionally designed and have all the necessary compartments, holes, and ports to assemble the gaming computer hardware.
All you have to do is buy one of these desk PC cases, configure all the necessary gaming computer hardware inside it, and your custom desk PC is ready.
These ready-made desk PC cases are the quickest and easiest way to build a computer into a desk.
The Best Ready-made Desk PC Cases
1. Hydra Desk PC Case
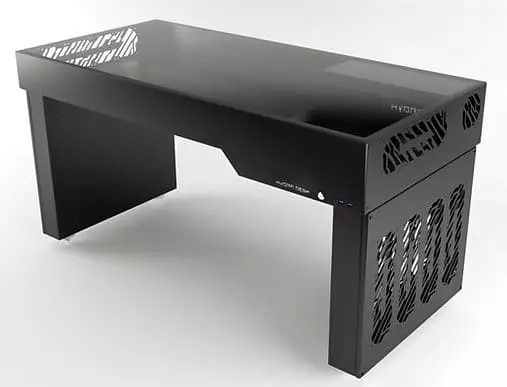
The Hydra desk is the most popular desk PC case with dual system support. This desk PC case is 59 inches wide and has an 8mm thick tempered glass top with a sturdy aluminum frame.
The desk is supported for two gaming PCs as well as can assemble a water-cooling system and has the option to position four radiators in the right leg.
The only downside of the Hydra desk PC case is that it is rarely available in online stores and can only be found on its official site.
2. LIAN LI DK-05 FX Black Desk Computer Case
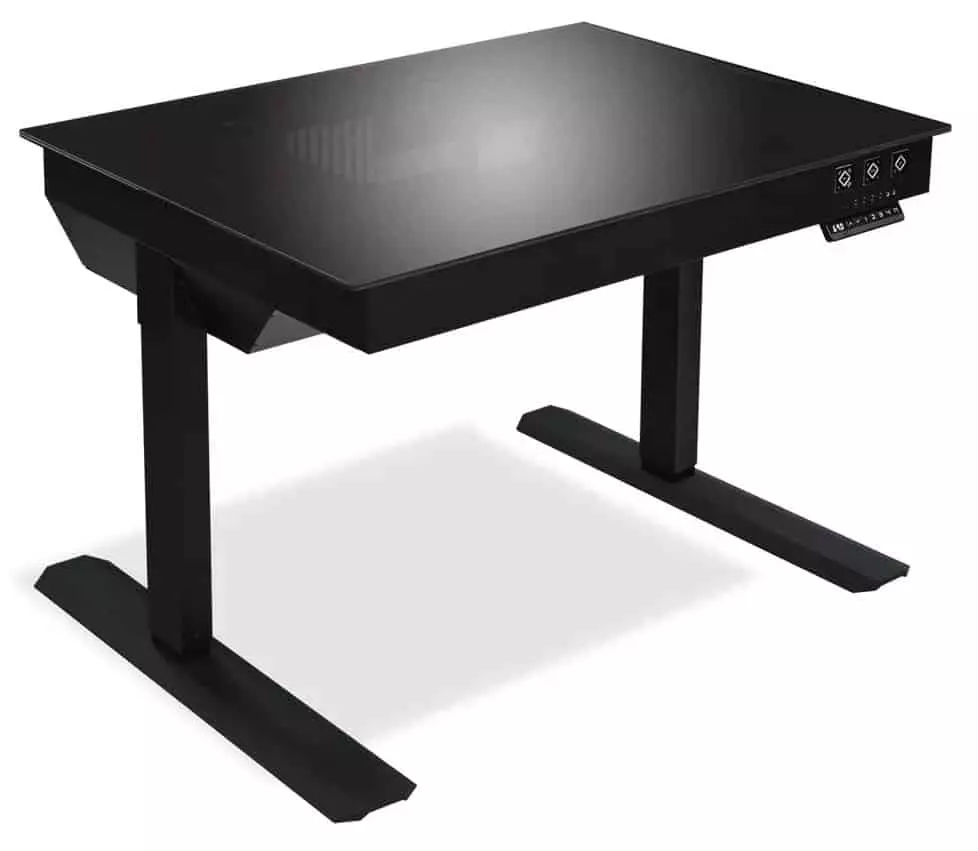
The LIAN LI DK-05 is another popular desk PC case available at NewEgg for sale. This is a 55-inch wide high-adjustable desk PC case supported for two E-ATX-sized PCs.
The desk has a thick aluminum frame and tempered glass top panel. The glass top is switchable from transparent to opaque mode with a touch of a button.
This desk PC case is also fully equipped with RGB controllers and supports installing the water-cooling system.
So, if you want to build a custom gaming PC inside and have a flexible budget, the Lian Li DK-05F is the go-to desk PC case to invest in.
3. ALAMENGDA Desk Computer Case
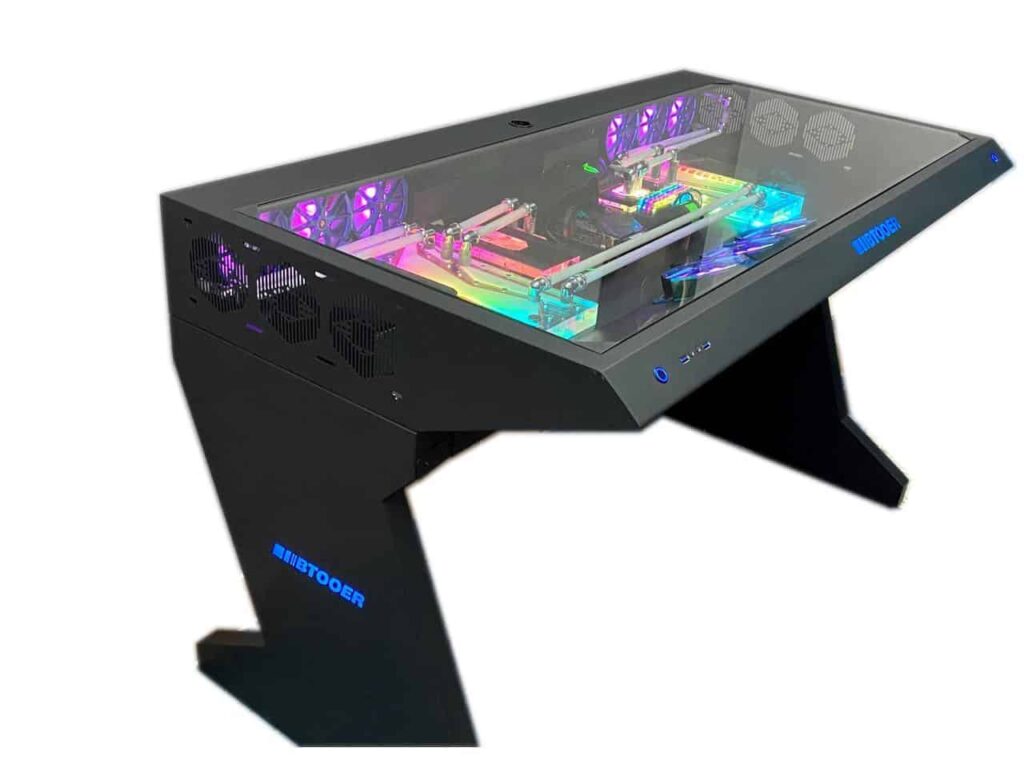
The ALAMENGDA desk is a compact but fully featured desk PC case that supports two gaming computers with in-built cooling systems and RGB strips.
It has an 8mm thick tempered glass top panel and thick aluminum-constructed Z-shaped legs with a powder-coated aluminum frame.
So, if you want a hands-on experience with a custom gaming desk PC then this desk PC case is a must-buy option for you.
4. LIAN LI DK-04F

The LIAN LI DK-04F is another desk PC case that carries almost the same features as its sibling LIAN LI DK-05F except it is designed to support a single PC.
However, this desk PC case has a smaller size but carries most of the goodness at a lower price tag. This desk PC case is available at NewEgg.
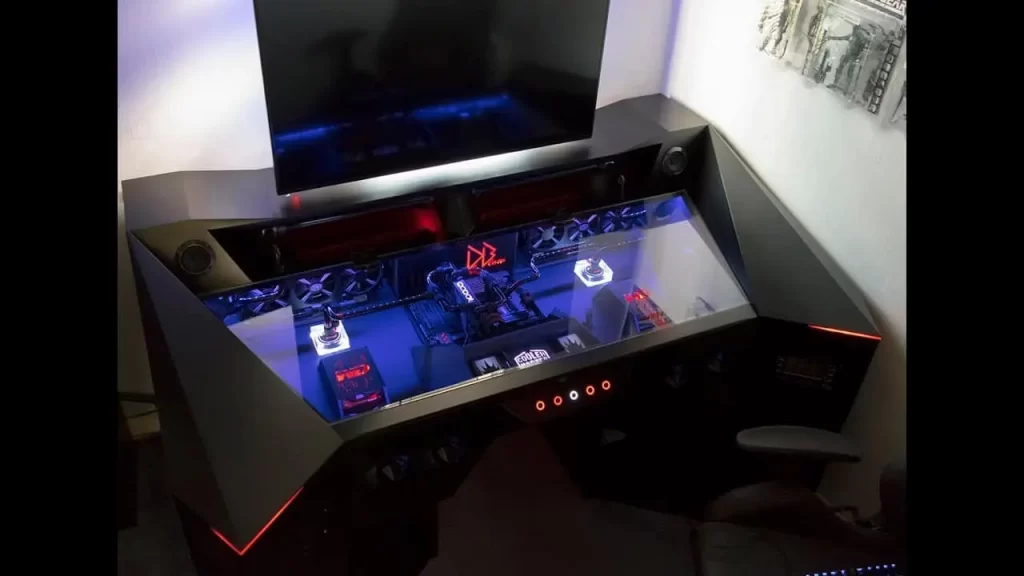
Awesome Desk PC Builds for Inspiration
Whether you’re looking for some fresh ideas or inspiration for building your dream custom desk PC, here are some great custom desk PC builds to get inspired.
The below desk PC builds are just awesome and demonstrate a complete plan for how you can build a gaming PC inside a desk.
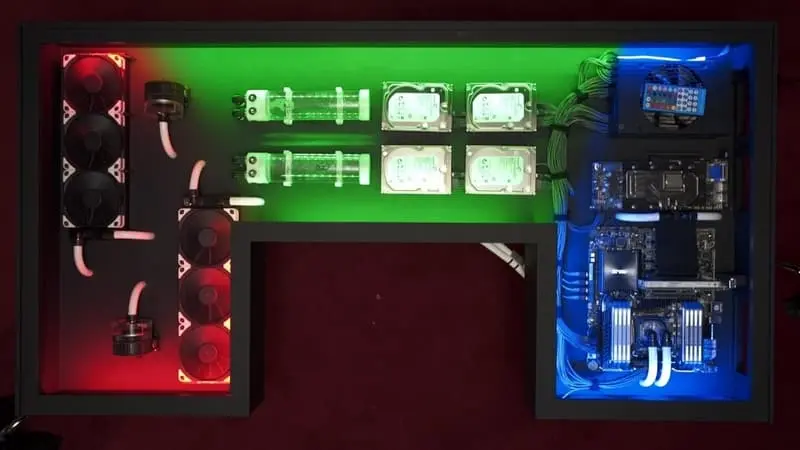
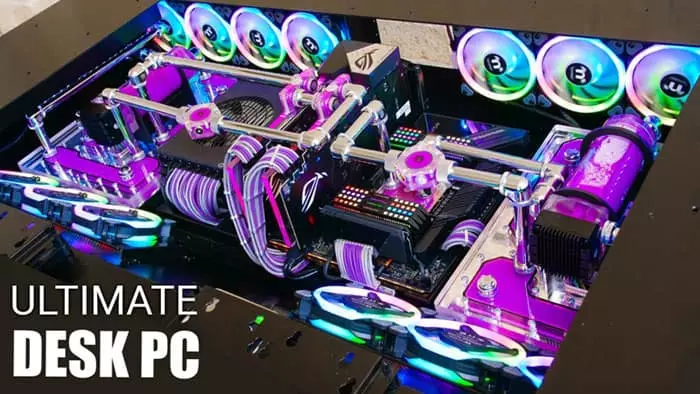
1. Ultimate DIY Desk PC
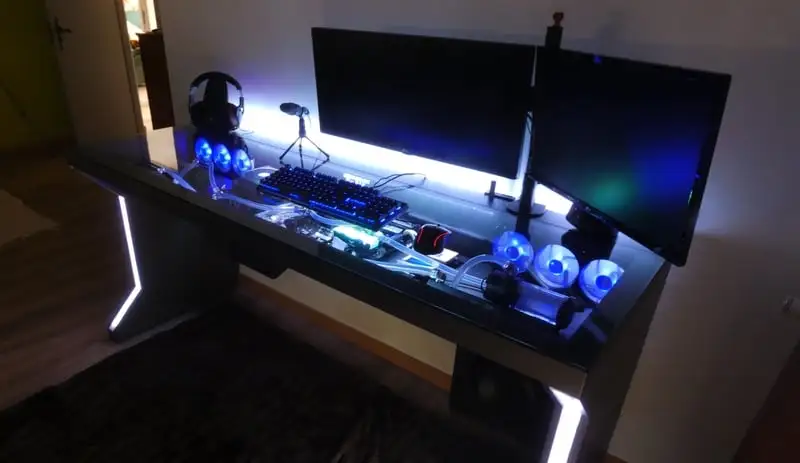
2. Ultimate Desk PC Build
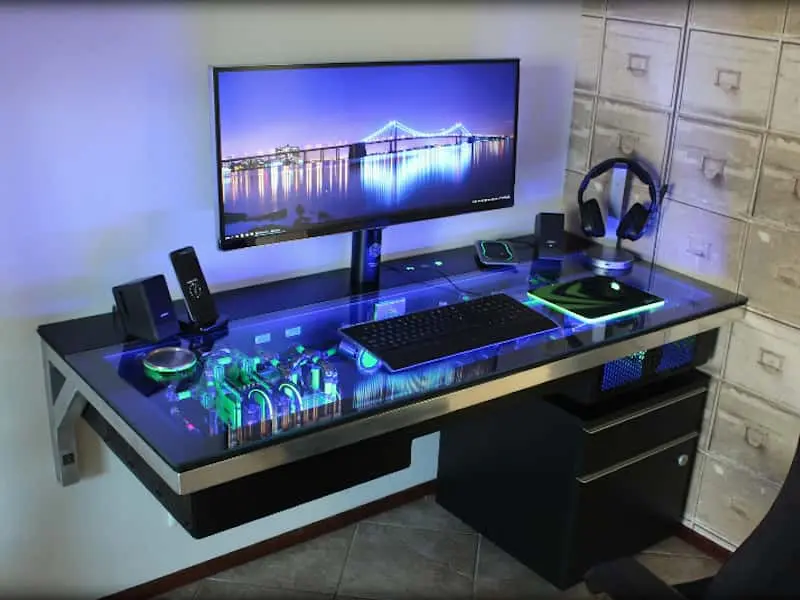
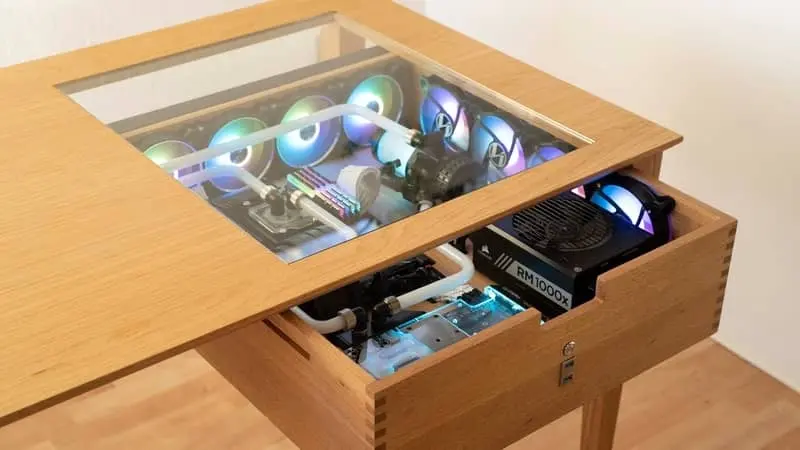
3. Ultimate Liquid Cooled Floating Desk PC
4. Custom Water Cooled Gaming Desk PC
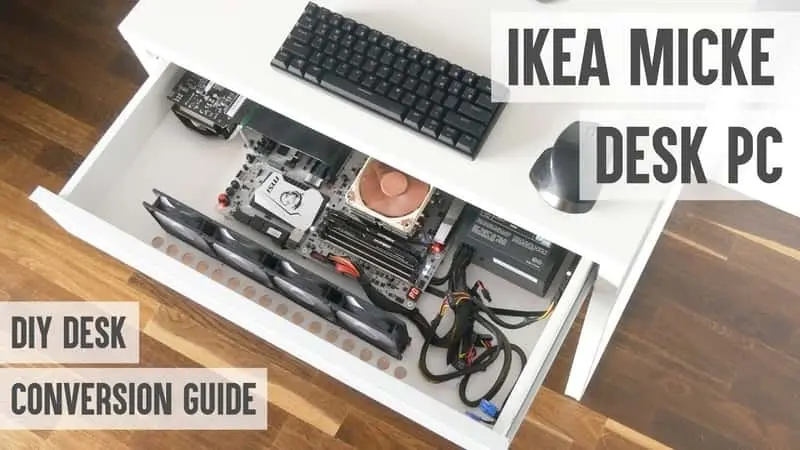
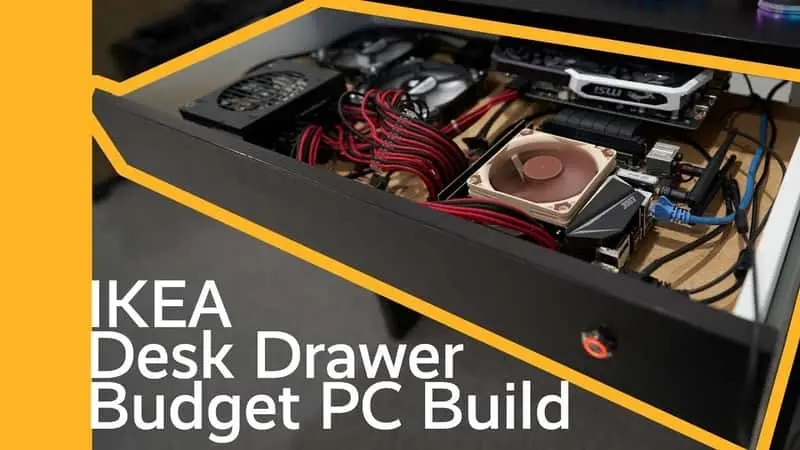
5. PC Built into IKEA Desk Drawer
6. DIY PC Built into Wooden Desk Drawer
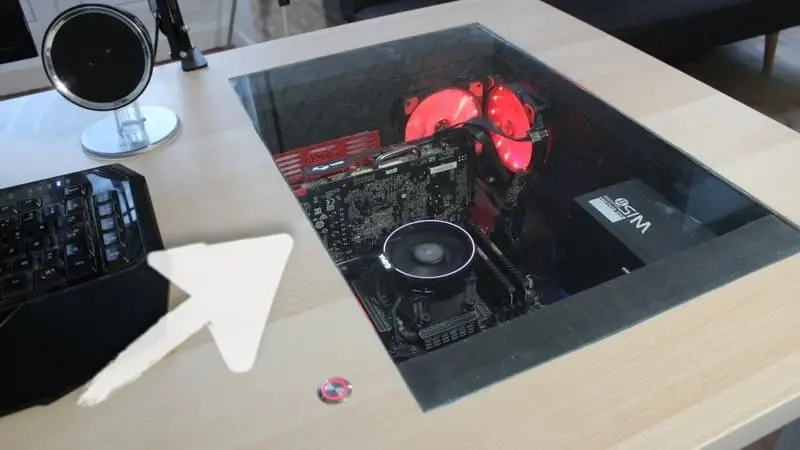
7. DIY Desk with Built-in Computer
8. IKEA Desk Drawer Budget PC Build
9. Ultimate Water-Cooled Gaming Desk PC
10. Gaming Desk with Built-in PC
11. PC Built Inside Desk
12. Water Cooled Desk PC
13. Custom PC in a Desk Build
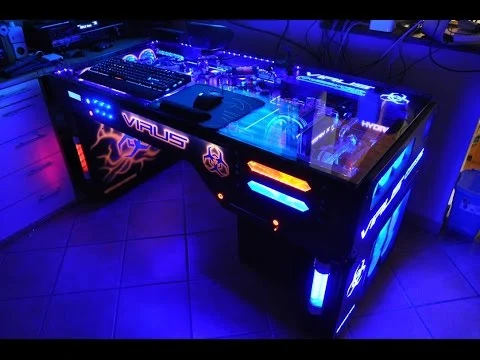
14. PROJECT VIRUS Extreme Liquid Cooled PC desk
15. ULTIMATE Custom Water Cooled Desk Gaming PC Build
16. PC Mounted in a Vertical Drawer
FAQ on Computer Built Into Desk
1. How much does it cost to build a desk PC?
Depending on the materials, the size of your desk, and the number of PC components you use to build your custom desk PC, the cost of your project will vary. You can build your DIY desk PC for as cheap as $200-$500 while a fully-featured high-end desk PC for as much as $1000-$2000 or even higher.
2. Is it more cost-effective to build your DIY desk PC?
Building a custom desk PC is always less expensive than buying a professionally made desk with a built-in computer. A custom desk PC allows you to choose the materials and PC components on your own or even you can utilize second-hand materials and components and reduce the cost of the project.
Conclusion
For any gaming enthusiast, a computer built into a desk can be a revolutionary way to create an inspiring gaming hub that caters to their diverse needs and reflects their personality.
Unfortunately, building a computer inside a desk can be challenging because of the complicated desk design approach and PC configuration.
However, utilizing a prebuilt desk PC case or hiring an expert can make creating your customized desk PC less hassle as well as save you precious time and money.
And as we’ve explored some great desk PC builds for your inspiration, remember that there are endless possibilities for your computer built into desk project.
Read also: